
A basic tutorial on getting liquids in your map
This is a short tutorial on how to correctly implement liquid volumes in your levels.If you wish to follow along you will need this file, this .pk3 includes the map/scripts/textures I used if you want to use them.
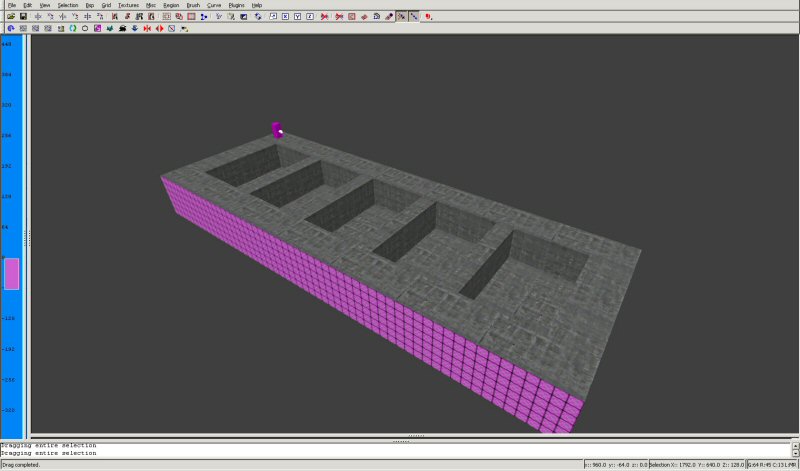
First off I created a couple of brushes like this so I can compile all the liquid shaders in one go. This is a basic method I use when testing multiple water shaders or glass shaders, I suggest using something similar rather than compiling 20 times you can compile once with 20 shaders.
The next step in creating your liquid shader is to make the brushes, here you can see I've made the liquid brushes not out of the liquid texture but the content type caulk, content types might be a new term for some people so I will explain a bit more. Each brush has a content type, solid/nonsolid/water/lava or slime, but each brush has several faces, each of which can be textured with a different shader that has a unique content type. If you have a brush thats textured with caulk (a solid texture) on some sides and a nonsolid shader on another the compiler will take the content type of the first surface it comes across when compiling the map. Its left up to the mapper to ensure that a brush has the same content type on each surface of the brush, which is why I am using specific "content type caulks"
See here too see the shaders I'm using
In saying this at the moment all 6 sides have the same content types, but when we texture the top they won't be. Which is why we need to ensure our liquid shader includes surfaceparm water/lava/slime depending which content type it is, so we can ensure that all sides have the same content types.
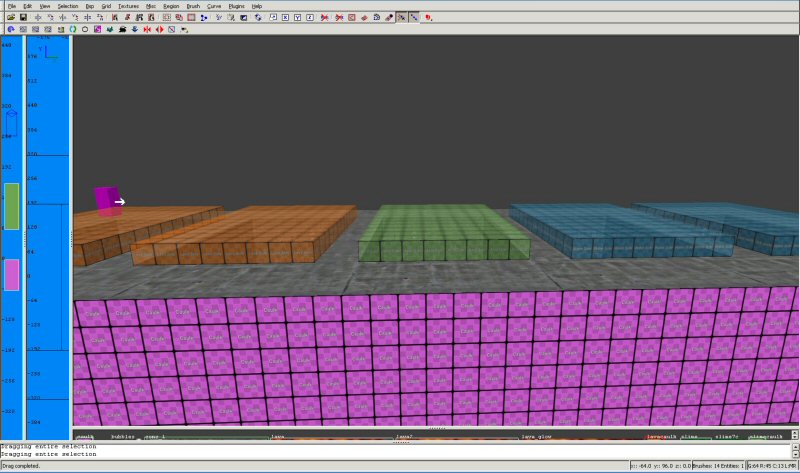
In this example I'm using 5 different shaders (2 lava 2 water and 1 slime) so I can demonstrate some different blendfunc's
You can see that I only textured the top face (hold ctrl and shift then click mouse1) this is to ensure we only load the side we want and so we dont load 5 un-necessary sides, which might be important if you're using deformVerticies.
Once again, you have to ensure that all sides of your brush have the same content type.

A good point to note is if you need to make multiple brushes of any liquid type, the same rules apply. Texture the whole brush with your content-type caulk, then texture the top surface with your liquid shader. If your using deformVerticies then the verticies will still match up, don't worry about the phases being out of sync. If your using fogparms then the brushes must be along 90 degree angles ie; a perfect square or rectangle which is not rotated.
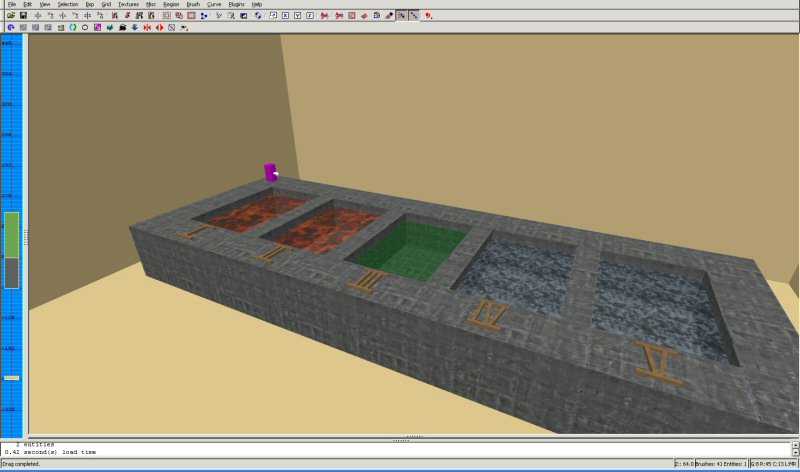
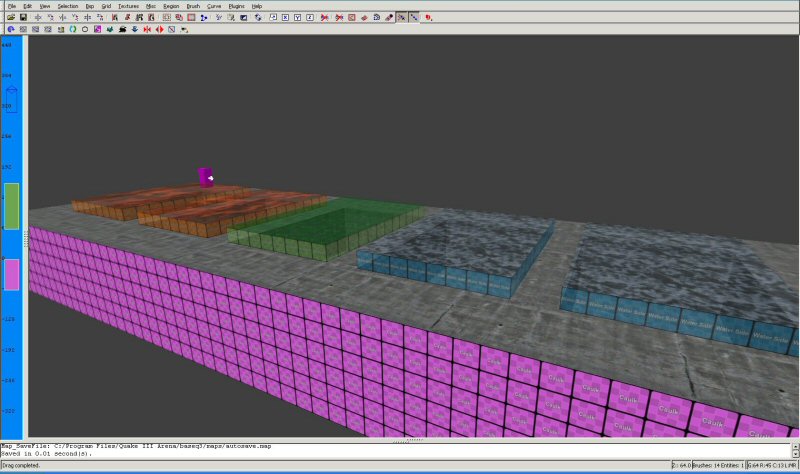
As a final result in Radiant I've placed the liquid as you would see it in-game with labels so I can tell which shader is which, placing a skybox around it all to give us the lighting.
Lets go see what it looks like in-game
The Results
If you can't be bothered downloading the files to see the scripts I've used, they are in the spoilers.
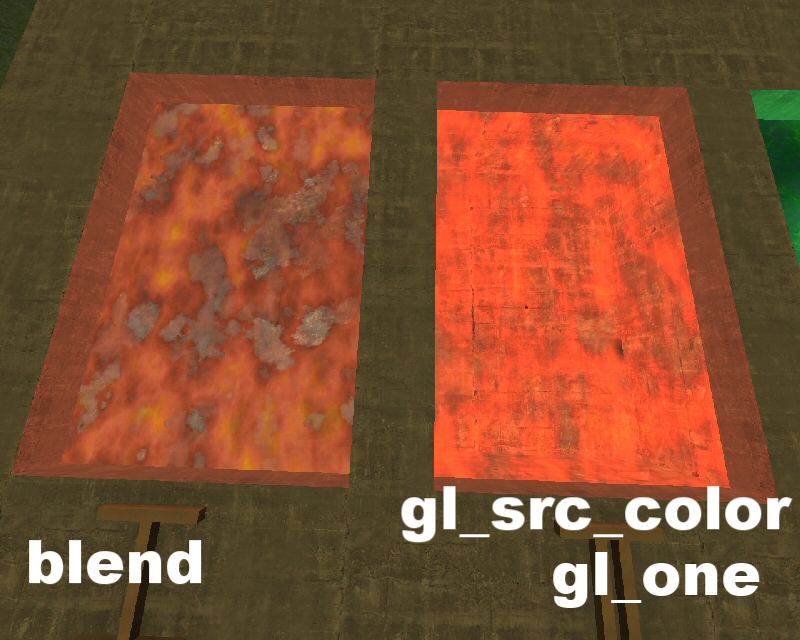
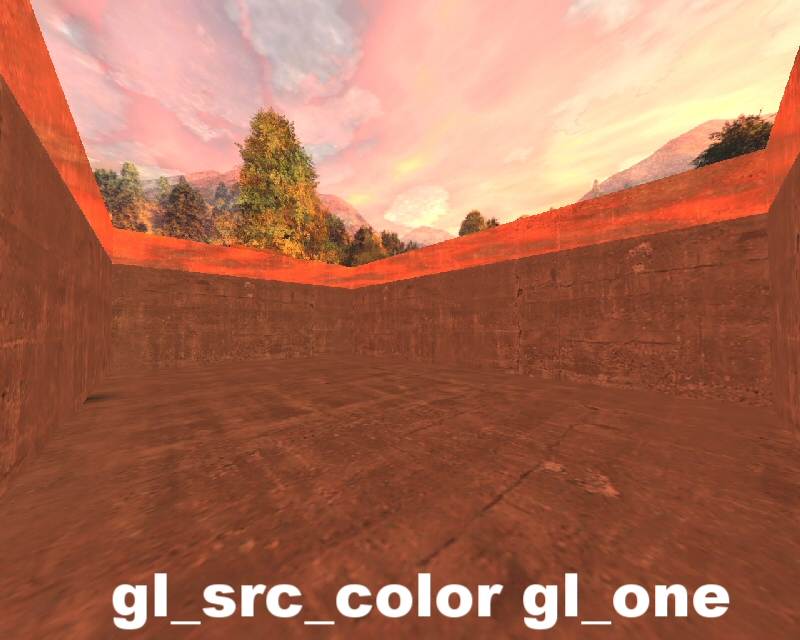
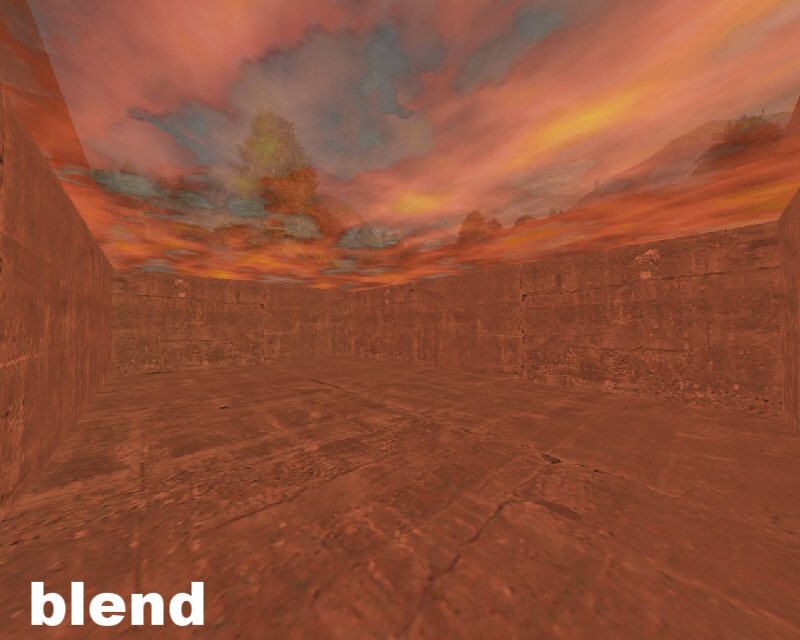
As you can see the desired effect is all dependant on the blendfunc you use, the color blended one (gl_src_color gl_one) looks overbright and hideous. Whereas the alpha blended one looks alot nicer, the texture I used is a .jpg so it doesn't hold an alpha channel which is why I "faked" one with the line alphaGen const 0.5 (the alpha channel is constantly at 50% transparencey)
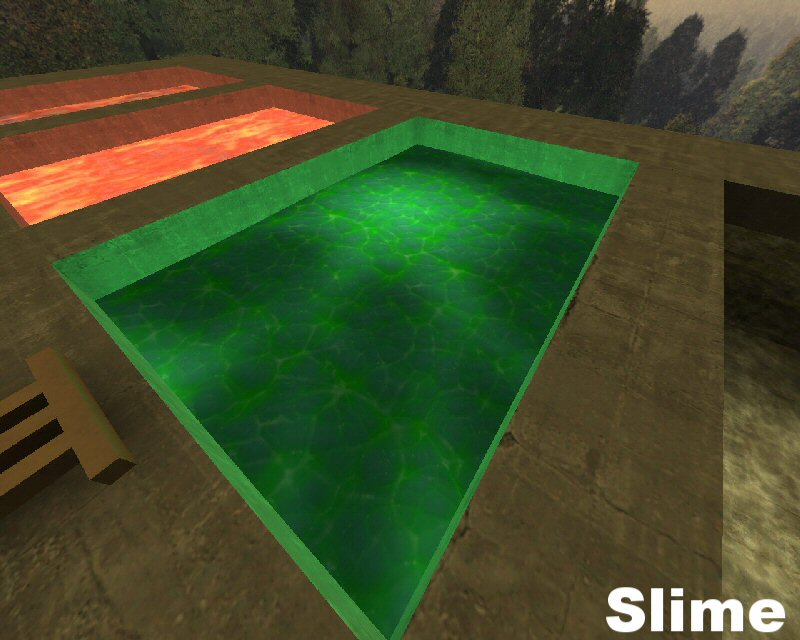
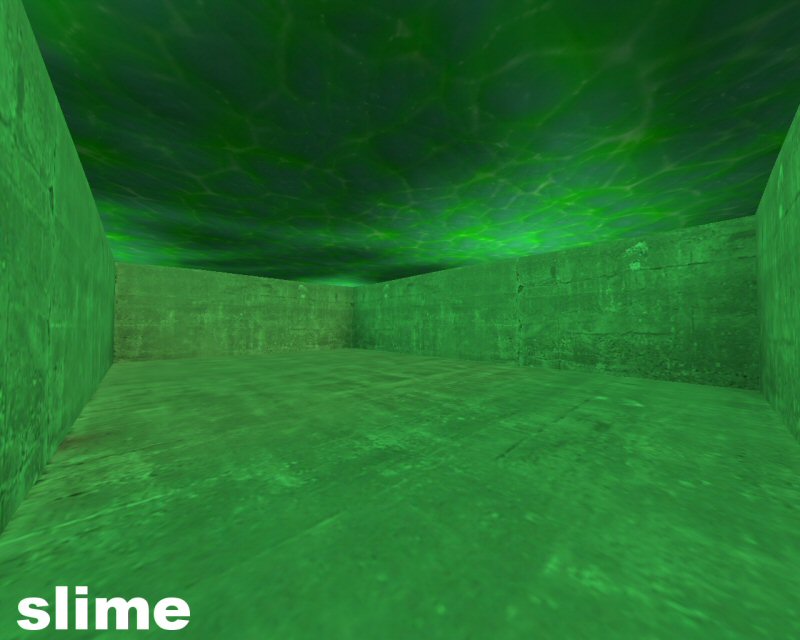
Slime is not a popular effect, and just like surfaceparm lava, slime will automaticly do damage. Slime generally looks nice when its not transparent, which allows us to flag out fogparms and add in some deformVerticies.
I don't think I've ever seen Slime in an Urban Terror map so if your willing to make yours the 1st be my guest. I havn't tried color blended slime (gl_src_color gl_one) but if you do I would suggest removing the last stage of the shader so you only have the 2 green textures.
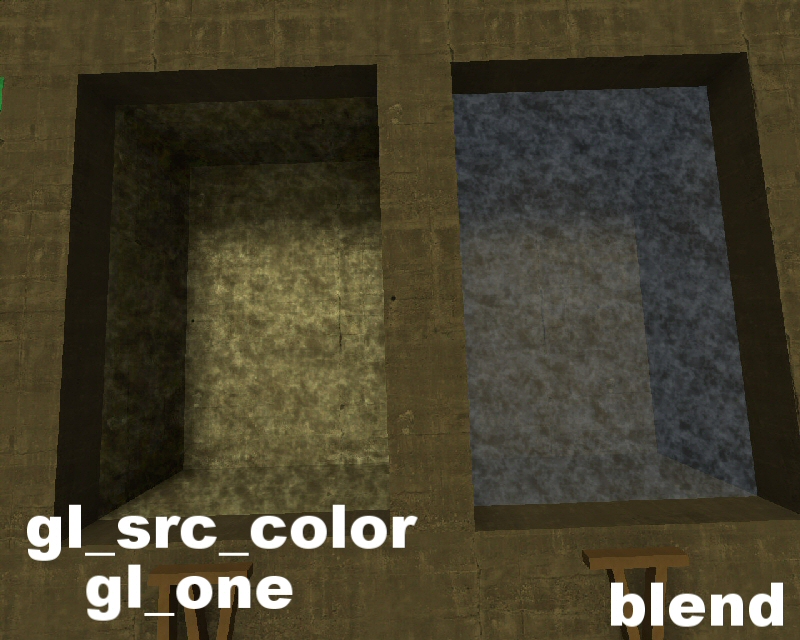
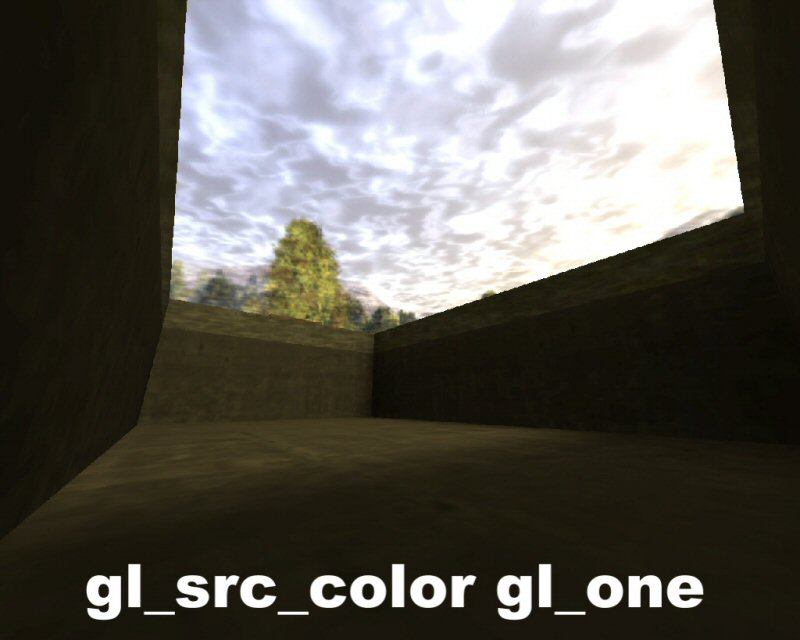

Ah ha, here we are at the most exciting part of the tutorial, water shaders! There are so many different ways to make water its not funny, I am only going to cover the most common 2. on the left we have the color blended version(gl_src_color gl_one) and on the right the alpha blended one, I've used the same trick as the lava by "faking" an alpha channel, my most favourable one is of course the alpha blended one, it keeps the color from the texture rather than blending it and it isn't overbright unlike the color blended one. It's also very easy to change the transparencey, all it takes is changing your "alphaGen const X" value(X being the value you enter) and you don't even need to recompile for that!
Important things to remember
-
When using deformVerticies do not use fogparms or vice versa, the effects clash depending on your values and produce some pretty undesireable results.
Depending on what texture you use you might want to exchange gl_one for gl_zero, ill explain on how each works. Blending using gl_one will result in all black pixels being 100% transparent and all white ones will be opaque (0% transparent) and gl_zero is the opposite, all that is white will be 100% transparent and black is now opaque(0% transparent)
If your going to use fogparms with any liquids shader its best to keep them away from patch meshes, bad things can happen and undesireable results will be the outcome. The brushes must be along 90 degree angles ie; a perfect square or rectangle which is not rotated.